This post makes up the second part of Making a Squeegee for Print Screen – The Blade post. Remember that silkscreen and print screen refer to the same printing technique. Silkscreen is the term applied to the time when the silkscreen mesh was actually silk, between the 18th century and the first half of the 20th century. Print screen is the term applied from the time when the mesh ceased to be made of silk and started to be synthetically manufactured with the discovery of nylon, at the end of the 19th century. But both terms are still used, regardless of its mesh origin, perhaps the silkscreen is more used in manual technique and the print screen in mechanized model like the industrial screen printing. But to differentiate the artistic from the non-artistic there is still the term serigraphy, created by the American National Serigraphy Society, in 1940. You can read more about it in the History of Screen Printing post.
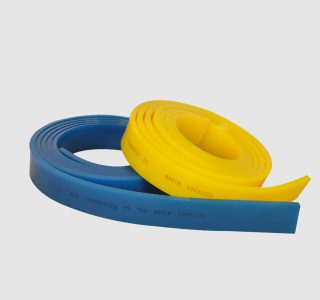
So, to make the squeegee manually, we will then opt to produce a very simple handle in pine wood and apply polyurethane rubber of 70A or medium hardness, with a straight profile, which should be purchased in a specialized shop. This rubber is generally supplied in small rolls, 1 to 4 metres long and 3.5 to 5 cm wide, at a cost of around 18 € (plus shipping) per metre.

The length of the squeegee is determined by the print area, and should extend beyond the limits of the matrix (stencil), which in turn should not go beyond 60% of the total screen area. For a 30X40 cm size screen, for example, the squeegee can have a maximum length of 30 cm, since in this case the matrix should always be smaller than 18X24 cm.
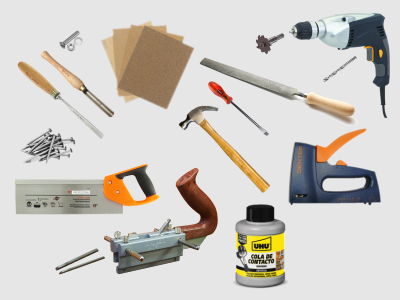
Cut a piece of pine wood about 20 cm long, 8 to 10 cm high and 2 to 2.5 cm thick; Round off the edges of the top for more comfortable handling; Make a groove in the base, about 1.5 cm deep and wide to fit 0.7 to 0.9 cm thick (depending on the thickness of the rubber purchased). You may bevel or round the edges of the base if you prefer. Cut the rubber to the size of the squeegee, insert it into the groove and fix it using water-resistant contact glue and staples, nails or screws (using screws with nuts makes it easier to replace the rubber).

Maintenance
Making a Squeegee for Silkscreen
The squeegees should be cleaned as soon as any printing job is finished and stored in a clean, dry place, with a certain slope so that the blade does not come into contact; a shelf of sloping shelves can be improvised or they can simply be placed aligned with the blade facing upwards.
Sharpening the squeegee
The squeegees should also be sharpened when necessary. A simple method is to construct a sharpener using two pieces of wood joined at right angles, one of which is lined with very fine sandpaper; put the handle of the squeegee against the side wood and slide it along the sandpaper until it is polished enough to reaffirm the rubber edges.
Nail the sharpener to a table to keep it firmly fixed and hold the squeegee firmly during sharpening; make sure the movement is made at a perfect right angle.
You can resort to even simpler ways of making a squeegee, after all you just need to find a way to spread and press the ink onto the canvas in order to print on the substrate and get the desired result. It all depends on your goal, whether a more professional job or just an experiment, whether a demanding job with detail and colours, whether a one-off job or a job of quantity and continuity.
Find references and more knowledge in Learning Links

